Portal Settings
To configure general settings for Portal, go to Tools Customer Portal Customer Portal Settings.
General Settings
The General Settings are the first set of settings that come up when you bring up the Customer Portal Settings.
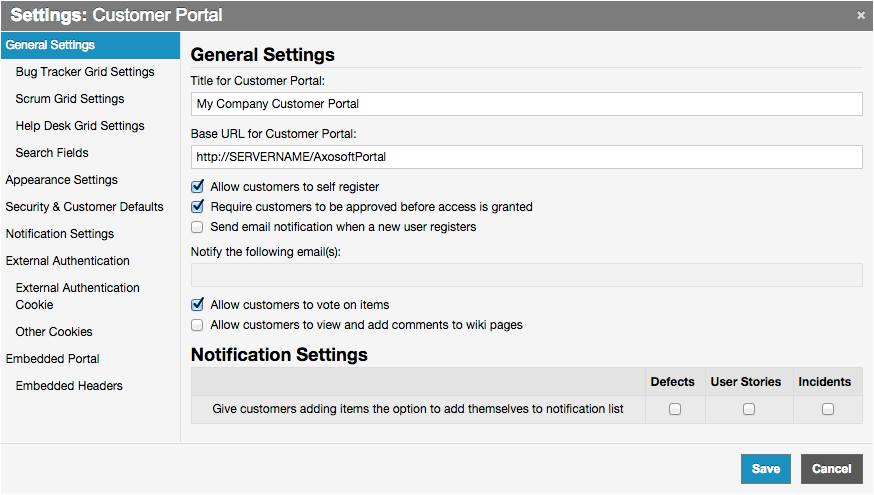
Base URL for Customer Portal is the URL where the Customer Portal is installed (Axosoft Installed only). Replace the default entry with your own URL. This URL is used by Axosoft and the Customer Portal when sending out notification emails to customers as a quick link for the customer.
You can control whether you want to allow customers to register themselves on the Customer Portal web site. If the Allow customers to self register checkbox is checked, Axosoft will place a link on the Customer Portal site where customers can go and enter in their company and contact information to register themselves in Customer Portal. Otherwise registration of new customers would be only done through Axosoft itself.
If you allow customers to self-register, you can also choose whether you want the customers to be automatically approved so they can use the Customer Portal right away, or if you want the approval process to be handled manually through Axosoft. If the Require customers to be approved before access is granted checkbox is checked then an Axosoft user will have to approve the customer before they can use the Customer Portal web site. You can select Send email notification when a new user registers box to have the system send an email when a new user registers. The text box below the checkbox allows control over who will receive notifications when customers are waiting to be approved for access to Customer Portal.
Grid Settings
The Defect Backlog Grid Settings and Product Backlog Grid Settings let you control which defect fields and feature fields are shown as columns in the main list on the Portal web site, and in what order they should be displayed.
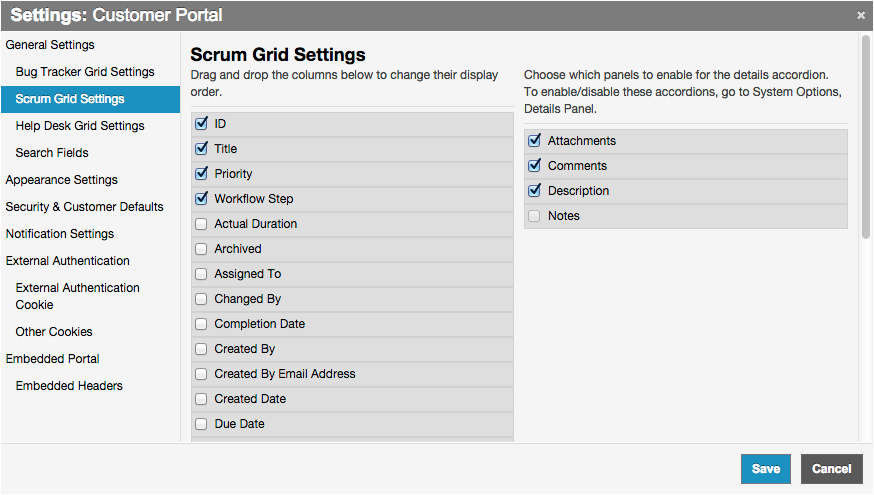
Note: These grids may have different names, based on your item type settings, located in Tools System Options under System Labels.
Check the fields that you wish to display as columns in the grids, and uncheck the ones you don't. You can then reorder the columns by entering the order number.
Appearance Settings
Appearance Settings let you customize the look of the Portal web site by allowing you to change certain wording and images.
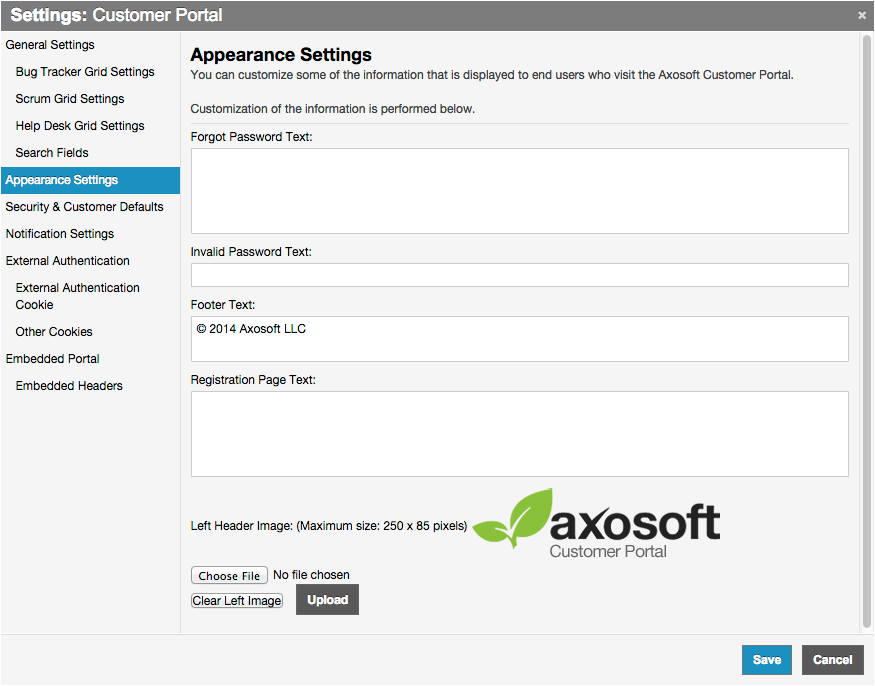
The Forgot Password text is displayed on the page that allows customers to retrieve their password when they forget it. Customers can get to this page using the Forgot Password link under the login button on the main Portal page.
The Invalid Password text is displayed when customers try to log in with invalid credentials. This string is displayed above the login button on the main Portal page, and it is only visible when an invalid email or password was used.
The Footer text is displayed at the bottom of all the pages in the Portal web site, above the Axosoft copyright notice. You can use this string to display your own company's copyright notice.
The Registration Page text is displayed on the registration page when a customer self-registers. Customers can get to this page using the Register link under the login button on the main Portal page, as well as using the Edit Profile link once they are logged in.
If you wish to replace the header image with your own, you can upload one here.
The Portal Field Template
The field template used when adding, editing, or viewing items in Portal is determined by the item's project. To change which template is being used, you can edit the project in the Organize Panel on the left (or All Projects to set globally) and select the desired template under Customer Portal on the left.
Portal Security Roles
Portal security roles allow the customization of user privileges within the Portal. To modify these, go to Tools Customer Portal Portal Security Roles.
Manage Portal Security Roles
This screen lists all current customer security roles, and allow for the creation of new security roles. The three icons on the right-hand side will let you edit, copy, or delete security roles.

Editing Security Roles
Tip: The Customer Portal permissions only applies to items where Show on Portal checkbox is selected. Customer Specific Permissions applies to items where the Customer Contact is set. The two permissions are independent of each other.

General Permissions
In General Permissions, you can restrict users' view of which item types they can add. This can be limited by all projects, an individual project, or no access at all. These items can also make use of filters.
Customer Portal Permissions/Customer Specific Permissions
In the screenshot above, distinct Permissions are set for the security role:
- View Items — Allows Customers to view all Items within Projects they have access to view and are set to Show on Portal
- Add Items — Allows Customers to add new items
- Edit Items — Allows Customers to edit Items
- View/Add Attachment — Allows Customers to view/add attachments
- View/Edit Their Items — Allows the viewing and editing of items assigned to this Customer Contact
- View/Add Their Attachment — Allows the adding and viewing of attachments on items assigned to this Customer Contact
- View/Access Any Items From People Within Their Company — Allows this contact to view all items assigned to contacts from the same company
Show on Portal items refer to items where the Show on Portal field is set to true. Show on Portal is a field included with all items in Axosoft and can be set like any other field, either by default when adding items or while editing items. If you do not have the Show on Portal field available when editing the item, add it to the template by clicking the gear icon in the upper right of the template window.
Notice: Portal users will not be able to update the Workflow Step field. This permission is reserved for fully licensed Axosoft users, so if you need an individual to update a workflow step then consider adding an Axosoft user.
Comments in Portal
Portal users may only make comments to items if:
- Portal user has Edit Items permissions
- Comments field is included on the project's portal field template
If both of these conditions are satisfied, portal users will also gain permission to add Comments from their Details Panel.
Security & Customer Defaults
Portal can be enabled to work for anonymous users, and not require customers to log in to view or report defects and features. Anonymous access can be control separately for defects and features.
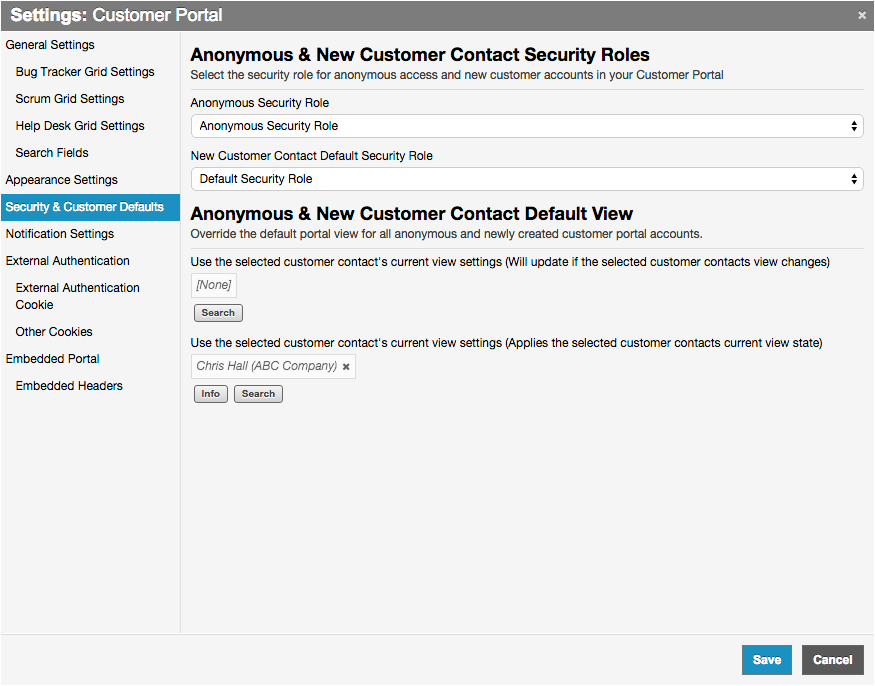
On this screen you can select the security role that anonymous users will have, as well as new customers that sign up on the Portal web page.