
Written by Laura Hinsley
You’re here! Welcome. Whether you just started a trial or are interested in using Axosoft for the first time, here are some super important things that will help you get started:
- Get your Existing Data
- Confirm/Define your Workflow Steps
- Confirm/Define your Field Templates
- Add your Projects and then Import your Data
- Visualize your Items in a Meaningful, Useful Way
Something to keep in mind: All of your data in Axosoft is represented as “work items”. These work items will always tie directly into a project in Axosoft. You don’t have to take the word “projects” too literally though!
Your projects in Axosoft can be anything! Ideas, backlog items, to-do lists for your weekend plans, anything! Although the tool is designed for agile software development, teams enjoy using Axosoft for all sorts of daily tasks and assignments.
You don’t need to follow these steps by any means, thousands of teams have used Axosoft successfully from the get-go without the help of my wonderful words of advice!
But if you let me guide you, I’ll save you some time and energy!
1. Get your Existing Data
Export the data from your old system or spreadsheet and get it into a CSV file. Don’t do anything with this CSV file yet! Next steps will highlight what to do in Axosoft before importing your data. If you don’t have any previous data, then on to step 2!
2. Confirm/Define your Workflow Steps
The workflow defines the steps your work items will “flow” through. You can rename, remove, add and move these steps for YOUR process. Depending on your plan, you will be able to create and manage workflows for every project.
Workflow steps by default are:
- New
- Approved
- In Progress
- Ready for Testing
- Completed
- Rejected
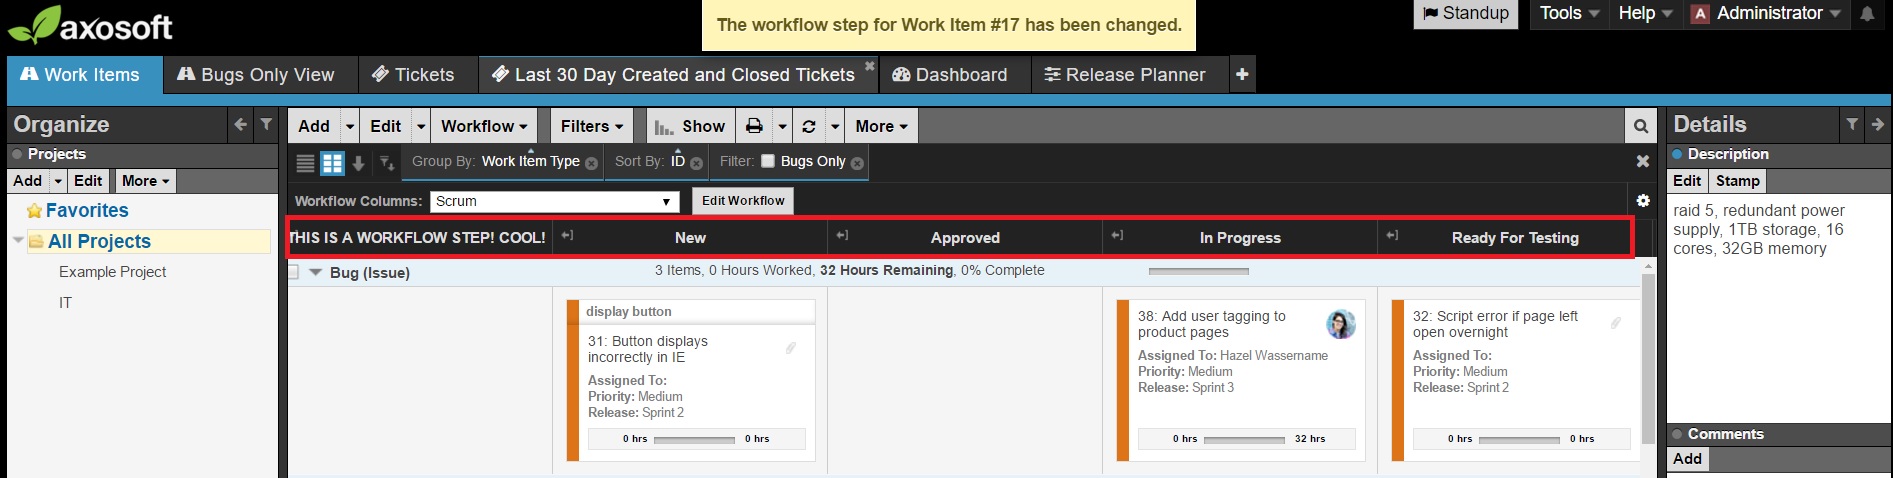
default workflow steps
3. Confirm/Define your Field Templates
The field template defines the information collected when adding a work item to a project. I can hear you asking, “What info do you need to collect when adding items?” Well, we have an awesome starter template laid out by default, but you can add custom fields to this and change the layout so it fits your team!
Depending on your plan, you will be able to create as many templates as your heart desires; the info may change from project to project or status to status.
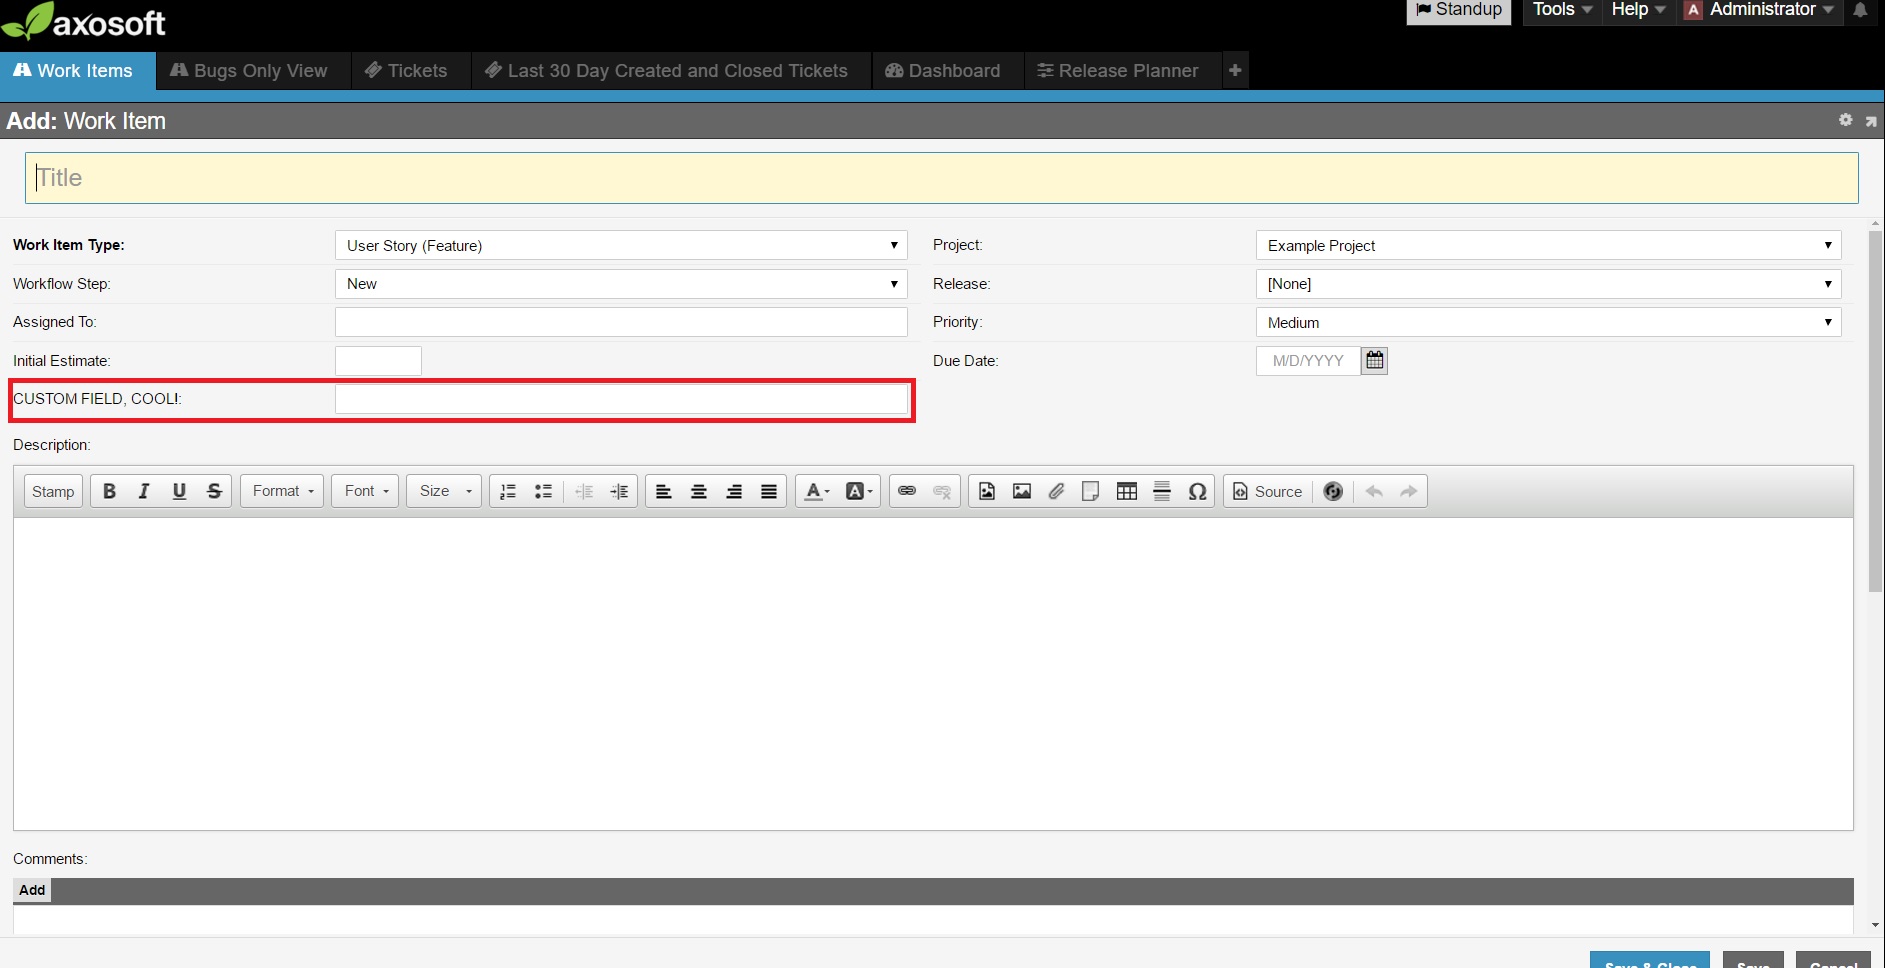
use the default or customize your field templates
4. Add your Projects and then Import your Data
If you have existing data, take the CSV that was saved from Step One and import your data. Now it’s time to start adding work Items to your projects; you will start to see how Axosoft looks and what it feels like to use. You’ll also start to visualize what the tool can do for you and what you can get out of it.
5. Visualize your Items in a Meaningful, Useful Way
Now, you can check out your items in a list or a card view (the card view is like a kanban board). Review our existing filters and create some of your own! You can also organize your items into groups based off different pieces of information such as ‘status’, ‘project’, ‘assigned to’ and more!
One more important thing, you can use these awesome filters and groups to create views for your team or for yourself.
For example, I created a view showing work items in “Website Projects” being assigned to the Development Team below.
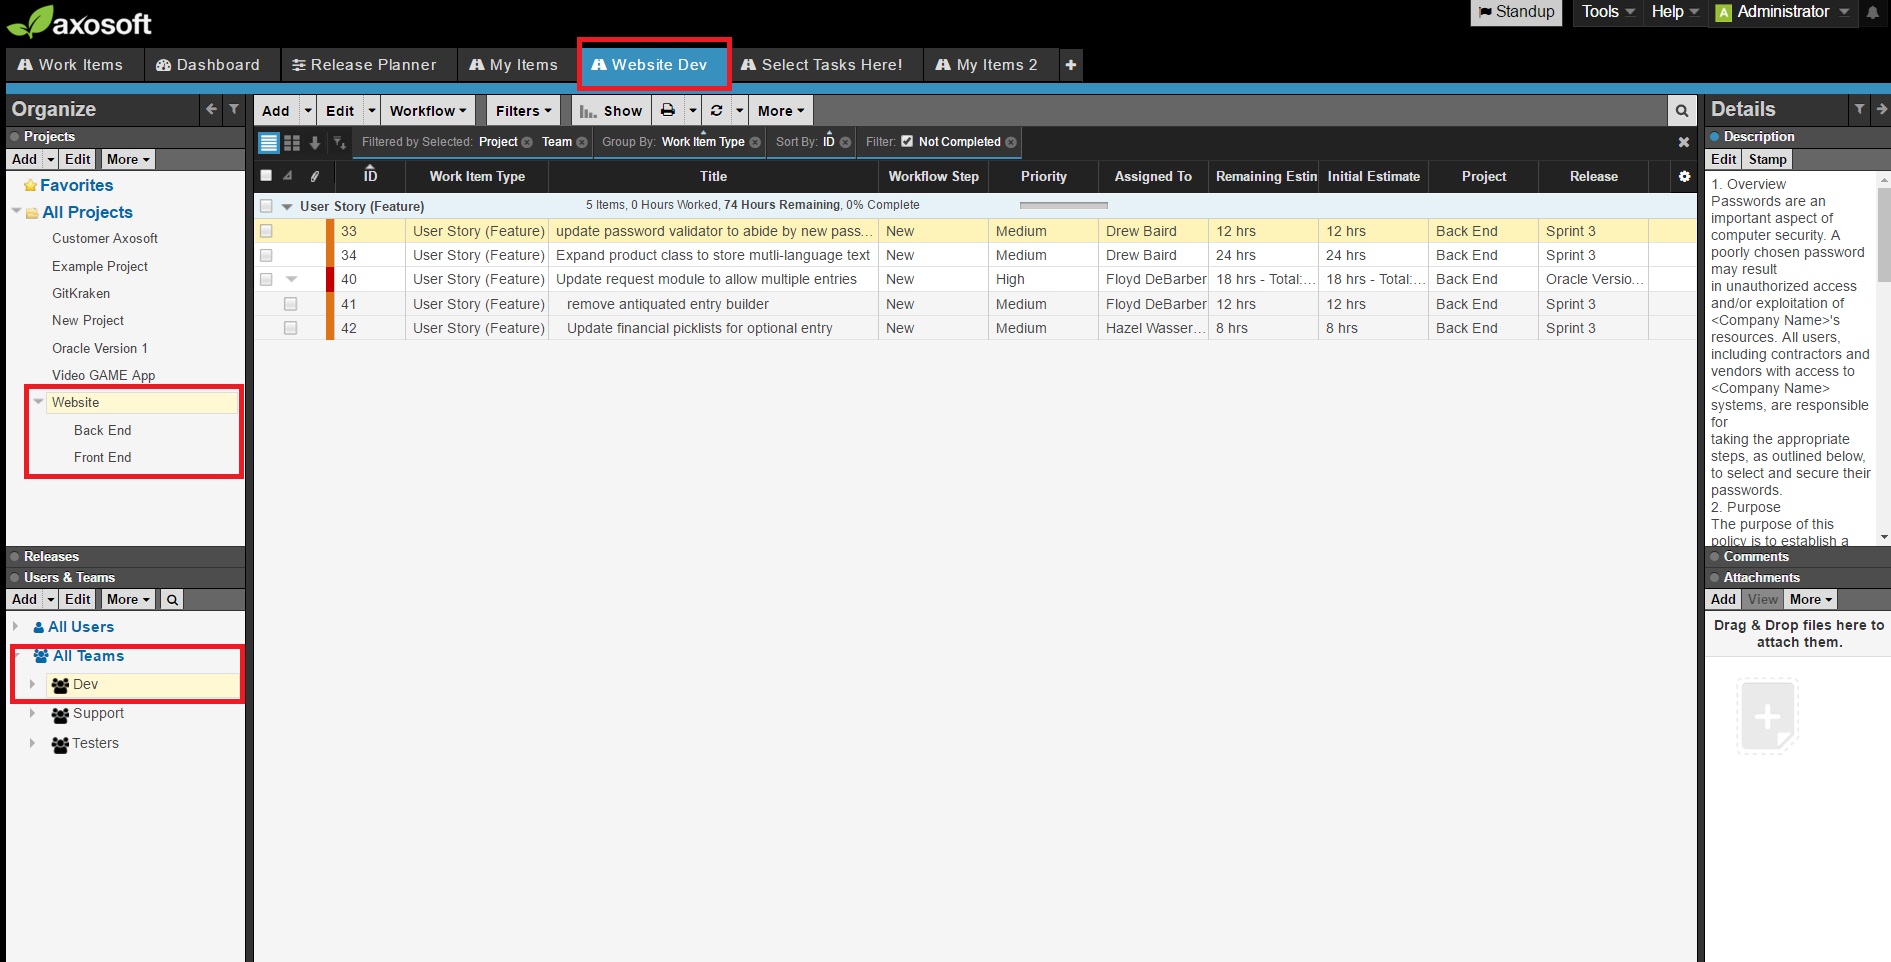
create a view to share with your team