
Written by Gus Figueroa
Axosoft’s API is a powerful tool that allows developers to build custom applications and extend the functionality of Axosoft Suite. Because of this, we decided to build a .NET API wrapper. This wrapper isolates developers from having to worry about spending too much time learning the details of a RESTful API or the nitty-gritty details of Axosoft’s API.
I know what you are thinking: this is all good, but how do I use it? Well, lets get straight to it.
To simplify things, we made the AxosoftAPI.NET library available as a NuGet package (available here). The first step is to add the AxosoftAPI.NET NuGet package to your Visual Studio solution. Depending on your preferences, you can install the package through the ‘Package Manager Console’ or the ‘Manage NuGet Packages’ window (how to install a NuGet package). In either case, the ‘AxosoftAPI.NET’ library reference will be added to your solution. You are now ready to start using the API wrapper.
Note: optionally you can download the source code and add it to your solution. Whatever you think is best for your project.
Now it is time to start typing some lines of code.
We begin with some ‘using’ statements (these are optional as you know, just keep in mind that these code examples will not use the classes’ fully-qualified names):

Then we need to create an instance of the AxosoftAPI.Net proxy. Here is how:

Basically you need three values: a URL for the account being used; and a set of client id and client secret keys either from the account being used (see here) or in the case of 3rd-party applications one provided by Axosoft (see here).
Next, we need to authenticate against Axosoft. Our API uses OAuth2 protocol for authentication and authorization. In this example we show how you can easily authenticate using the Username/Password option:

Note: The AxosoftAPI.NET library also exposes a method for authenticating using the ‘Authorization Code’ option, but it is up to the developer to handle the necessary redirects required by the OAuth2 protocol (example application).
Before we start making calls to Axosoft’s API, it is important to point out a couple of things. The first point is that all calls made are dependent upon the permissions of the credentials used to authenticate. For example, if you have five projects in Axosoft, but the credentials used only have access to three projects, then when making a call to get all projects the API will return only those three projects. Makes sense, right?
The second point is that all the results returned by the library are wrapped on a class of type ‘Result’. This class contains three properties as shown below:
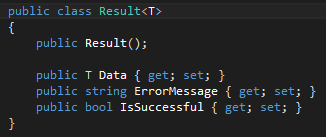
The ‘Data’ property contains the corresponding result return from the API; the ‘ErrorMessage’ contains the error returned by the API or ‘null’ if there was no error; and lastly, the ‘IsSuccessful’ flag is set to ‘true’ if no error, or ‘false’ otherwise. Pretty straight forward.
Ok, so let’s start making those calls I promised. The following example shows how to get all projects:

Wow, that was easy.
Here is a piece of code from a console application which gets all the projects and then loops through them and writes to the console the projects Ids and names:
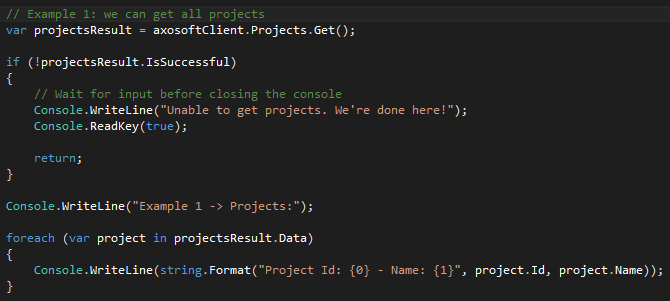
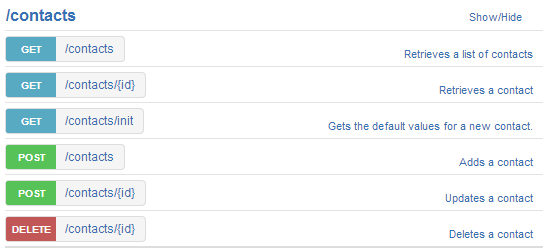
In this case we used the property ‘Projects’ and its method ‘Get’ to retrieve the project. The AxosoftAPI.NET proxy has a property for every resource listed in our API documentation. Each of these properties is an interface for one or more methods. These methods map one-to-one with the different HTTP request allowed by each resource. For example, let us look at the ‘Contacts’ resource. From our documentation we can see that it allows for six different calls:
If we now look at the ‘Contacts’ property in the proxy object, we can see that it contains a method call for each one of these HTTP requests:
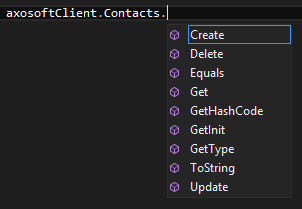
Note: the ‘Update’ method corresponds to the POST-update HTTP request; and the ‘Create’ method corresponds to the POST-create/add HTTP request.
Keep in mind some of these methods have overload methods as well. For example, the ‘Get’ method has a one-optional-parameter method which will return all objects; it also has an ‘integer’ – resource Id – parameter method which will return one single object based on the Id value.
Here are a couple of examples from the same console application for creating a new project and adding a new feature to it:
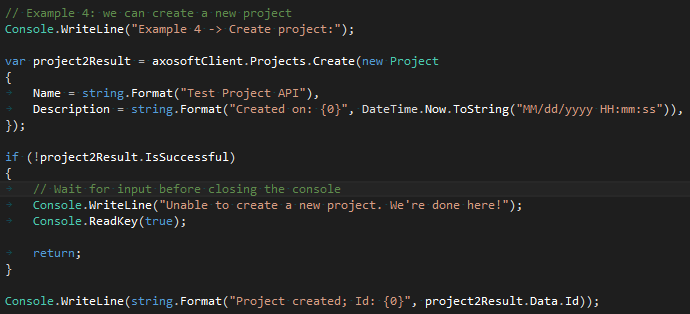
Described in a few words, you need to create a ‘Project’ object, populate the Name property – all other properties are optional – and pass it as the single parameter to the ‘Create’ method of the proxy’s ‘Projects’ property.
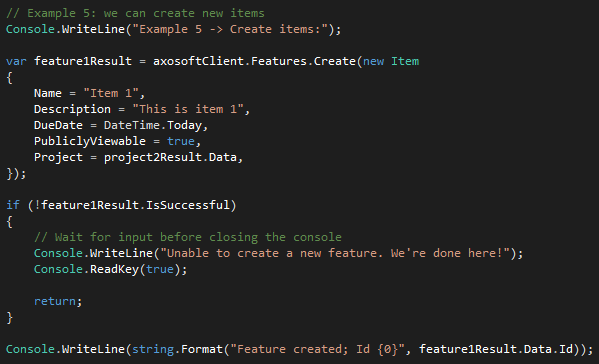
Then, for the new feature, you need to create a new ‘Item’ object, populate the corresponding properties (see our API documentation for more details about required fields and other notes), and then call the ‘Create’ method of the proxy’s Feature property.
For more examples just download the example application and play with it. If you have questions, please feel free to contact us at support@axosoft.com. We are happy to help you.