
Written by Jonathan Silva
Though primarily an agile project management tool, Axosoft has a range of support capabilities for teams looking to unify development and support under one tool. Before we jump into what Axosoft can do, let’s review some of the major objectives of any support team:
- Minimize the time to respond to customers
- Minimize the time to report defects to development/engineering
- Minimize the time to forward enhancement requests to the Product Owner
There are more jobs to be done of course, but these three objectives work symbiotically to address immediate customer issues while getting defects or shortcomings in the product addressed in the long term. This article will assume that your administrator has already set up your Axosoft support permissions and environment. If not, or if perhaps you are the admin looking to configure Axosoft, then we have sprinkled gratuitous links to our documentation to guide you along.
Also if you are brand new to Axosoft, we recommend watching this 90 second intro video first.
How do I respond to customer issues through Axosoft?
Axosoft manages customer issues through what we call tickets (probably a very familiar concept for you support veterans). Axosoft tickets make it easy to respond to customers via email. There are three general ways to create a ticket in Axosoft:
- Create a ticket directly on behalf of the customer (How do I do this?)
- A customer emails you and creates a ticket (Wait, how can I set this up?)
- A customer creates their own ticket in the Customer Portal (Here’s a webinar on it)
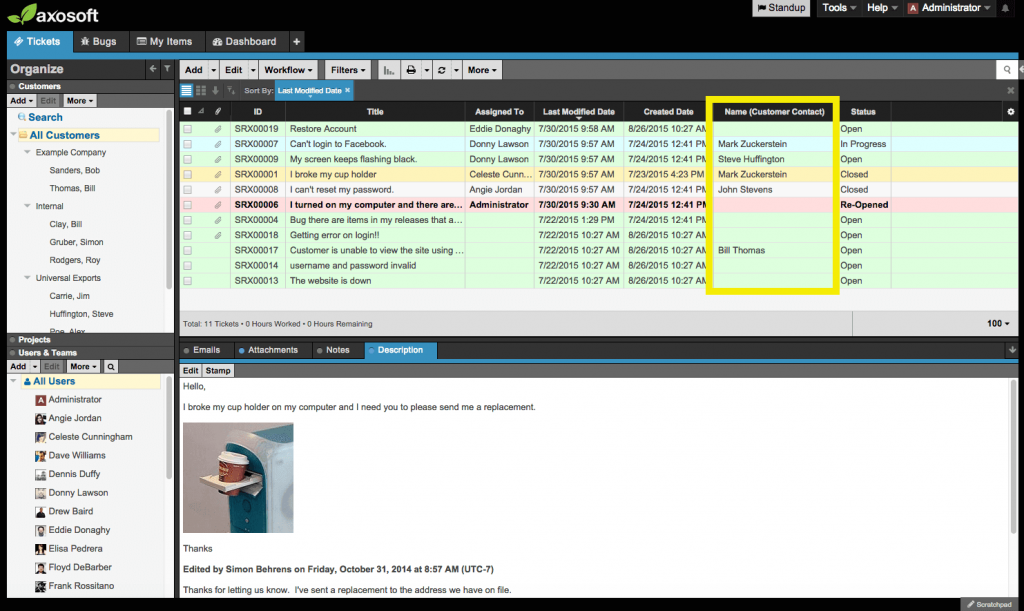
Once Axosoft has been configured, you will get a support queue that might look like the screenshot below.
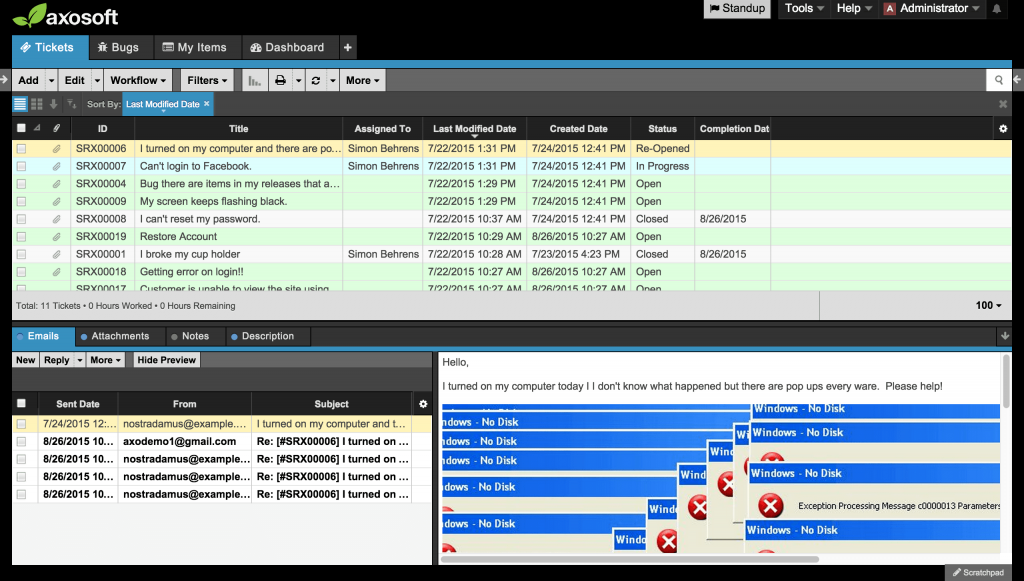
Here’s a sample. This view makes it easy to review the email thread for any item.
If you don’t know where to get to your queue, your Axosoft administrator likely created a supertab for easy access. If not, start by adding a Tickets tab by hitting the plus sign and clicking Tickets. This is also where you will find any supertabs already available to you:
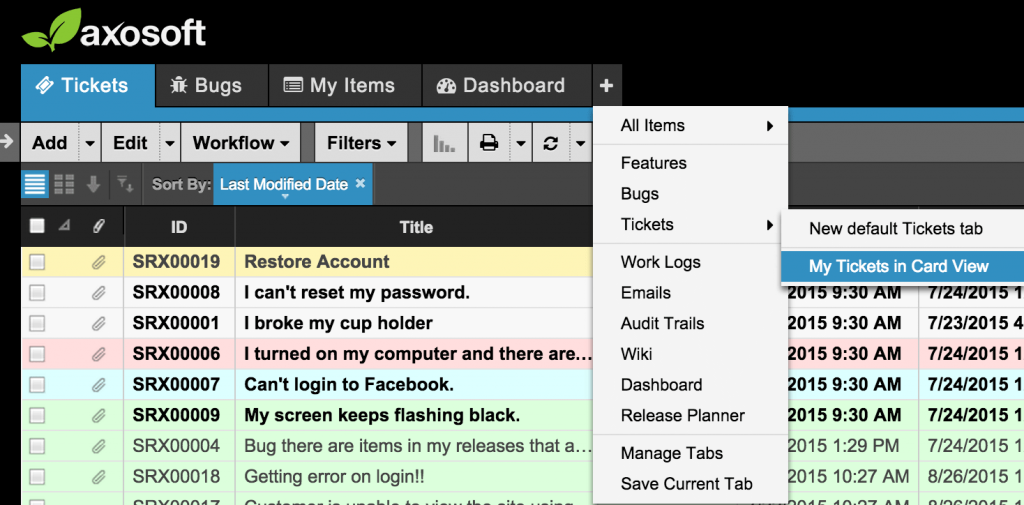
Add a tickets tab to get started, or select a supertab that’s ready to go.
A standard default Tickets tab may have the Emails pane and Description pane docked to the bottom of your screen (as shown in the first screenshot). These panes came from the Detail Panel (as shown in that 90-second email) and you are welcome to dock more of these panes by clicking this little arrow in the upper right corner of each pane.
Beautiful! As shown previously, these adjustments now make it easy to review a customer’s email to support. Selecting any item created via email will now show you the original email sent by the customer, and the ensuing thread of responses.
Respond to your customers by hitting reply, and then when you are done you can “Save and Change the Workflow Step.”
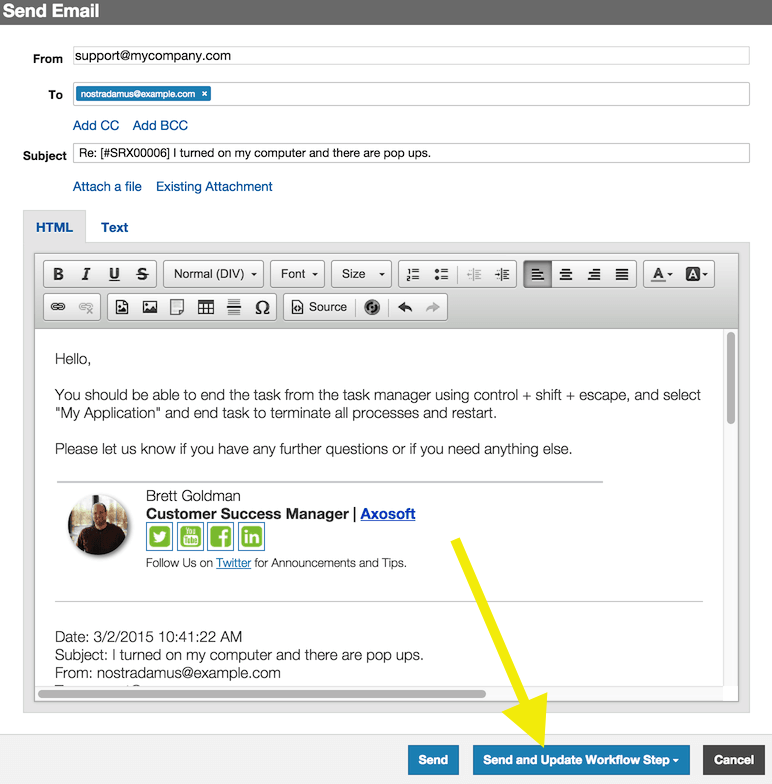
Click here to send the email and update the workflow step.
Ta-da! You just responded to a customer who emailed you with an issue and you updated the workflow step. But what do we do about customers who submit issues via the portal?
How do I respond to customer issues submitted via the Customer Portal?
If you have a hosted account with Axosoft then you have access to the customer portal. If you don’t know your URL, navigate to Tools/ Customer Portal/ Go to my Customer Portal. If you are an installed customer, be sure you installed the Customer Portal before trying to access it.
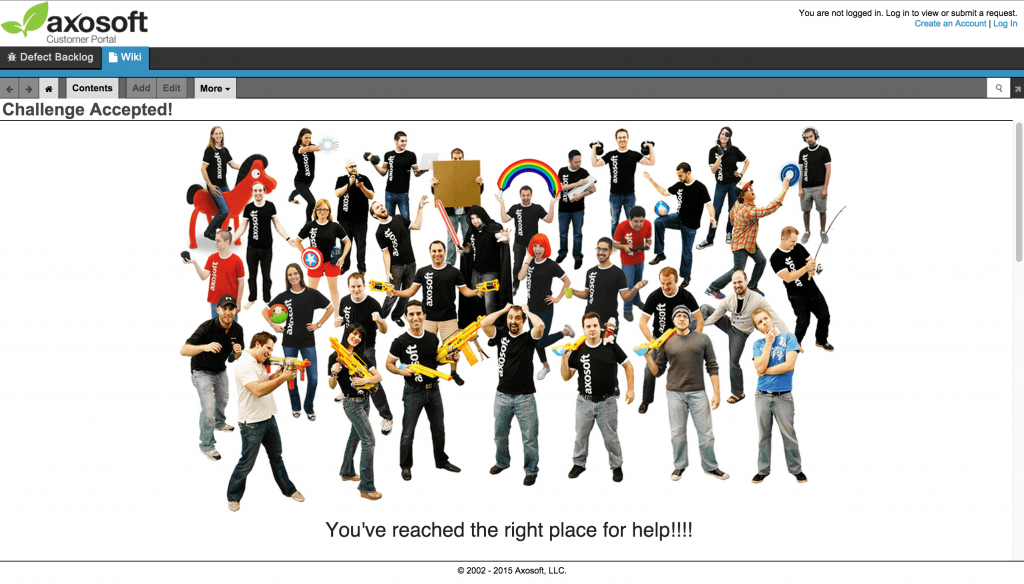
Here’s how we have our portal if you need a sample.
Share this portal URL with your customers (or even internal teammates) if you want them submitting tickets. The tickets your customers submit will appear in the Axosoft queue just like your emailed tickets. That means responding to these tickets follows the same process as those that are created manually or via email.
Your portal tickets will populate your queue.
The great thing about the portal is that you can have registered customer portal contacts already included in the tickets they create. If you are looking for portal best practices then please check out our Customer Portal Webinar.
If you need a hand with setting up the customer portal, we recommend starting with Portal Security Roles. Consider creating a dummy portal user so you can log in and tailor the view.
How do I escalate a ticket to a defect/feature?
Workflow! We can enable a workflow setting that copies ticket details over to a newly created defect when you move a ticket to that workflow step. By default, you should see a workflow step called “Closed-Defect” in the ticket Starter Workflow when you navigate to Tools/ Other Settings/ Workflows. If this has changed there is no need to worry as this is just one example.
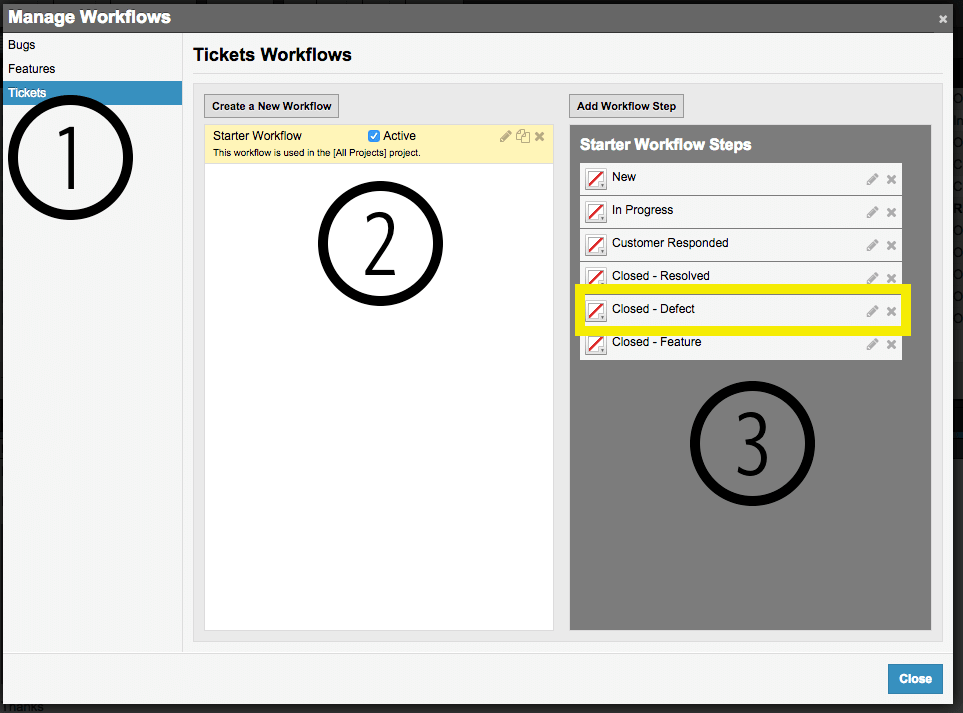
Here’s how to edit a workflow step. This is where you apply colors too! Click the white box with the red slash to change color.
Click to edit this workflow step and hop over to the Other Settings tab. You should see where you can enable an action that copies any item that moves to this workflow step over to defect (or even feature).

Flip this to feature (or however you have named it) to create that item type instead.
For more information, watch this video on workflow to see how I break it down and demonstrate this in action.
Pro Tip: You can color code!
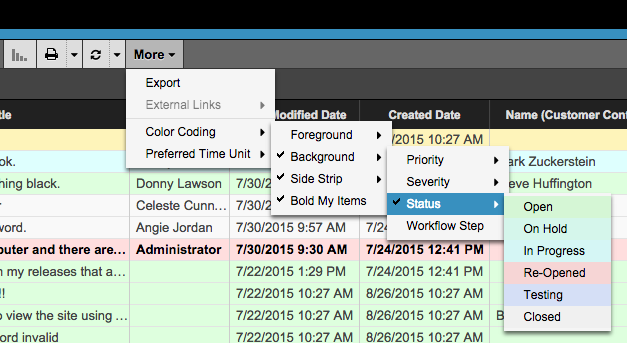
Yes! If you navigate to the More menu, you can enable color coding based off of:
- Status
- Workflow step
- Priority
- Severity
Use colors of the rainbow!
We recommend color coding your grid to make it easier on the eyes. Navigate to Tools/ Fields/ List Types to select Status, Priority, or Severity and then edit the color scheme for each option. Workflow step colors can be edited from Tools/ Other Settings/ Workflows. You will need to select the workflow to see the steps on the right, and then just click the white box with the red slash in it to adjust the color. Insert your favorite hexadecimal!
Pro Tip: Update workflow step via email
We previously showed you how to update workflow step when responding to a customer via email. You can also access the dropdown menu in the workspace UI to update the workflow step for the selected item.
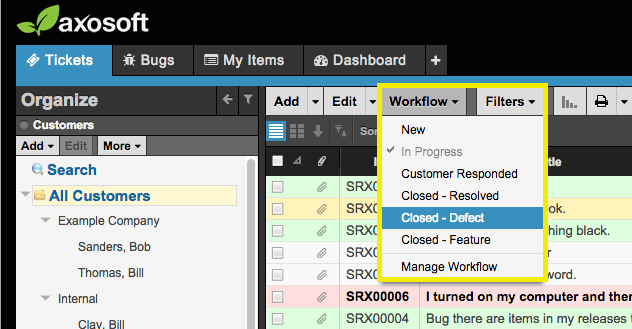
Use the Workflow button!
So there you have it. If you have questions on the above, then please don’t hesitate to send an email to success@axosoft.com or share your thoughts with us on Twitter!